

Table of Contents
- Introduction to Concrete Driveway Installation
- Site Preparation
- Design and Layout
- Subgrade and Formwork
- Concrete Pouring
- Finishing Touches
- Maintenance

Introduction to Concrete Driveway Installation
If you’re considering a concrete driveway installation in Townsville, you want it done right. As seasoned concrete contractors, we’ve seen it all, from residential driveways to commercial slabs. Here’s a comprehensive guide to ensure your driveway not only looks great but also stands the test of time.
Site Preparation
Proper Site Preparation Before Pouring Concrete:
Before any concrete is poured, proper site preparation is essential for a successful concrete driveway installation. Taking the time to prepare the site thoroughly can prevent future issues such as cracking, settling, or water damage. A well-prepared site ensures the driveway remains durable and stable for years to come.
Detailed Steps:
Evaluate Drainage:
One of the most critical steps in site preparation for concrete driveway installation is assessing the natural flow of water around the area. Water should always be directed away from the house and foundation to prevent pooling, erosion, or potential structural damage. If necessary, grading adjustments should be made to create a slight slope (typically a minimum of 1-2% gradient) that allows water to run off efficiently. In some cases, installing a drainage system such as French drains or surface drains may be required to manage excess water effectively. Poor drainage can lead to standing water, which weakens the soil beneath the driveway and causes cracks over time.
Soil Testing:
The type of soil in the construction area plays a crucial role in determining the stability of the concrete driveway installation. Certain soil types, such as expansive clay or loose sandy soil, can shift over time, leading to cracking or uneven surfaces. Conducting a soil test helps identify whether stabilisation is necessary. For clay-heavy soils, soil amendments like lime or crushed rock may be added to improve stability. If the soil is too sandy or loose, compacting it thoroughly or adding a sub-base layer may be required to prevent shifting.
Excavation:
Once drainage and soil conditions are assessed, excavation begins as part of the concrete driveway installation process. For a standard residential driveway, a depth of 100-150mm is typically required to provide a strong and stable foundation. However, for driveways expected to bear heavier loads, such as those used for trucks or RVs, deeper excavation (up to 200mm or more) may be necessary. The excavated depth should account for both the concrete thickness and any sub-base material used. A mechanical compactor is often used to ensure that the soil at the base is firm and level, reducing the risk of settlement after the concrete is poured.
Clearing:
Before laying any sub-base or pouring concrete, all roots, grass, and other vegetation must be removed to ensure a stable concrete driveway installation. Plant growth beneath the concrete can create weak points, leading to cracks and uneven surfaces. Additionally, any organic material, such as decomposing roots or leaves, should be cleared out, as these can break down over time and cause voids beneath the concrete. Any large rocks or debris that could affect the stability of the base should also be removed. If tree roots are present near the driveway, consider using a root barrier to prevent them from causing future damage. A clean, well-prepared site provides the best foundation for a long-lasting concrete driveway installation.
Design and Layout
The design stage allows you to carefully consider the size, layout, and overall appearance of your driveway. By planning ahead, you can ensure that your Concrete driveway installation not only complements your property’s style but also provides sufficient space for vehicles to move easily and safely. A well-designed driveway enhances both the practicality and aesthetic appeal of your home.
Key Considerations:
Dimensions:
The width and length of your driveway are crucial factors in ensuring ease of use. A standard residential Concrete driveway installation should typically be around 3 to 4 metres wide for a single car and around 5 to 6 metres wide for a double-car driveway. If you have larger vehicles, such as SUVs or trucks, you may need to increase the width to prevent tight manoeuvring. The length of your driveway will depend on the space available on your property, as well as any local council regulations that may apply.
Shape:
The shape of your driveway affects both its functionality and visual appeal. A straight Concrete driveway installation offers a modern, clean-lined appearance and is a practical option for properties with direct access to the street. A curved driveway can create a more natural and inviting look while helping to navigate around trees, gardens, or other landscaping features. If space allows, a circular Concrete driveway installation provides excellent convenience, allowing vehicles to enter and exit without the need to reverse. This option is particularly useful for larger properties or homes with high traffic flow.
Aesthetic Options:
The surface finish and colour of your Concrete driveway installation contribute significantly to the overall look of your property. There are several options to choose from:
- Plain Concrete: A simple and cost-effective choice that provides a clean, modern appearance with minimal maintenance.
Coloured Concrete: This option allows you to add character and match your driveway to the exterior of your home by choosing from a wide range of colours. The colouring is typically added through pigments or surface treatments. - Stamped Concrete: Designed to mimic the look of natural materials such as brick, stone, or pavers, stamped concrete adds a decorative touch while maintaining durability. This option is ideal for homeowners looking for a high-end finish without the cost of traditional stonework.
Exposed Aggregate: A popular choice for its textured finish and slip-resistant properties, exposed aggregate combines durability with a visually appealing, natural stone look.
By carefully considering these elements during the design stage, you can create a Concrete driveway installation that enhances the beauty of your property while ensuring it remains functional for everyday use.
Subgrade and Formwork
Concrete driveway installation requires careful preparation to ensure longevity. To achieve a durable driveway, it is essential to focus on compacting the subgrade and setting strong formwork. These steps create a stable foundation and define the shape of the driveway, preventing future issues such as cracking or sinking.
Steps
Concrete Driveway Installation: Compacting the Subgrade
A well-compacted subgrade is crucial for the stability and longevity of the driveway. Without proper compaction, the soil beneath the concrete can shift, leading to cracks and uneven surfaces over time. The process involves the following steps:
Clearing and Preparing the Site – Remove any debris, vegetation, or loose soil from the area where the concrete driveway installation will take place. This helps to create a clean and stable base.
Moistening the Soil – Lightly dampen the soil before compacting, as this helps in achieving better compaction by reducing air gaps. However, avoid over-watering, as excessive moisture can weaken the base.
Using a Mechanical Compactor – A plate compactor or a roller compactor should be used to press the soil down uniformly. This ensures an even and solid foundation that will not shift under the weight of vehicles.
Checking the Compaction – Walk over the compacted area and use a tamper to test for any soft spots. If the ground feels unstable in any area, additional compaction is required.
Concrete Driveway Installation: Setting the Formwork
The formwork plays a critical role in shaping the driveway and holding the concrete in place during the pouring process. Properly installed formwork ensures the driveway maintains the desired shape and dimensions. The steps include:
Choosing the Right Materials – Use strong and straight wooden planks or metal forms that can withstand the pressure of the wet concrete. Wooden forms are commonly used for residential concrete driveway installation, while metal forms offer greater durability.
Placing the Forms – Position the formwork along the edges of the driveway, following the planned dimensions. Ensure the forms are secured firmly in place using stakes or pegs at regular intervals.
Ensuring Proper Alignment – The formwork must follow a smooth, continuous line without bends or irregularities. Use a string line or a laser level to check alignment and ensure the edges are straight.
Bracing and Reinforcing – Secure the formwork further by adding extra stakes or braces where needed, particularly in areas where the concrete might exert more pressure. This prevents the forms from shifting or bowing during pouring.
Concrete Driveway Installation: Levelling
Proper levelling ensures that the driveway surface is smooth, even, and properly graded for water drainage. An uneven driveway can lead to water pooling, causing long-term damage. The process includes:
Checking the Formwork Height – Use a spirit level or laser level to ensure the forms are set at the correct height and slope. Adjust as necessary to create a slight slope for drainage, directing water away from the garage or house.
Adding a Base Layer (If Required) – In some cases, a gravel or crushed stone base is added to improve stability. This base should also be levelled and compacted before the concrete driveway installation process continues.
Final Adjustments Before Pouring – Double-check all levels, making sure the surface is even. Make any final adjustments to the formwork or compacted base to avoid inconsistencies in the finished driveway.
By following these steps carefully, you will create a strong and stable foundation for your concrete driveway installation, ensuring durability and preventing common issues such as cracking, shifting, or water pooling.
Concrete Pouring
The quality of the concrete mix is one of the most important aspects of your driveway’s strength. A high-quality, durable mix is necessary to ensure longevity and resistance to wear and tear. Using the correct proportions of materials and ensuring proper curing techniques will contribute to the overall performance and durability of the concrete driveway installation.
Process:
Mixing:
It is essential to use a concrete mix designed specifically for concrete driveway installation to achieve the necessary strength and durability. The mix should include the right balance of cement, sand, aggregate, and water. A common ratio for a strong driveway mix is one part cement, two parts sand, and three parts aggregate, though this may vary depending on local conditions and specific requirements. The water-to-cement ratio is also crucial, as too much water can weaken the mix, while too little can make it difficult to work with. Adding plasticisers or other admixtures can enhance workability and strength. Proper mixing, whether done by hand for small areas or with a concrete mixer for larger sections, ensures uniformity and prevents weak spots in the concrete driveway installation.
Pouring:
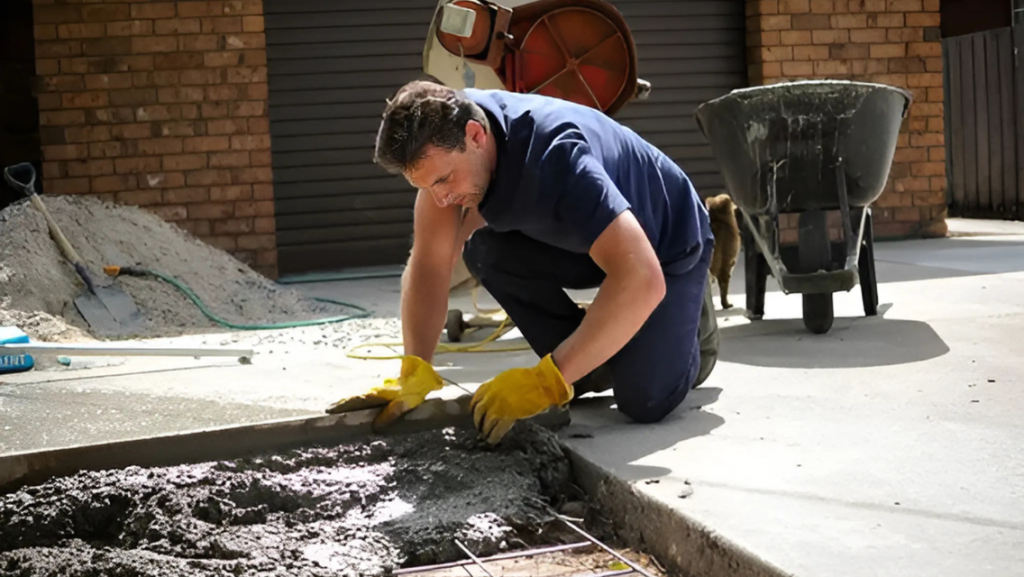
Once the concrete mix is prepared, it must be poured into the formwork in a timely manner to maintain consistency and avoid setting prematurely. The formwork should be sturdy and properly aligned to define the shape of the concrete driveway installation and prevent spillage. As the concrete is poured, it should be spread evenly using rakes and shovels to ensure that all areas are properly filled. To remove air pockets and ensure the mix settles correctly, a vibrating tool or tamping method can be used. Care must be taken to avoid excessive vibration, which may lead to segregation of materials and weaken the structure. The surface should then be levelled using a screed board and smoothed with a float to create an even, compact finish.
Reinforcement:
To enhance the strength and durability of the concrete driveway installation, reinforcement materials such as steel mesh or rebar should be placed within the concrete before it fully sets. Reinforcement is especially important in driveways that will bear heavy loads, as it helps prevent cracks from developing due to pressure, temperature changes, or ground movement. Steel mesh or rebar should be positioned slightly above the base layer using small concrete spacers to ensure it is embedded in the middle of the slab, rather than resting on the ground. Proper placement of reinforcement ensures that the entire concrete driveway installation remains structurally sound and can withstand daily use over time.
Finishing Touches
Once the concrete driveway installation is complete, finishing and curing are crucial steps to ensure a smooth, durable, and long-lasting surface. Proper finishing techniques help prevent common issues such as cracking, scaling, and surface imperfections, while effective curing enhances the concrete’s strength and resistance to wear. These steps are essential for achieving a high-quality driveway that not only looks good but also performs well under daily use and varying weather conditions.
Techniques
Smoothing
After the concrete driveway installation has been completed and the concrete has been poured and levelled, smoothing is performed using trowels and floats to create a uniform surface. Hand floats or bull floats are commonly used to push down any aggregates and bring the finer cement paste to the top, resulting in a smoother finish. The timing of smoothing is critical; if done too early, it can weaken the surface, and if done too late, it becomes difficult to achieve a consistent finish. Power trowels may be used for larger areas to ensure an even and polished look. Proper smoothing eliminates rough or uneven spots that could compromise the driveway’s appearance and functionality.
Texturing
To improve safety and provide better traction, a textured finish is often applied during the concrete driveway installation process. A common method is the broom finish, where a broom is dragged across the surface before the concrete fully sets. This creates a slip-resistant surface, which is particularly important in wet or icy conditions. The depth and direction of the broom strokes can be adjusted to suit aesthetic preferences while maintaining functionality. Other texturing techniques, such as exposed aggregate or stamped concrete, can also be used to enhance visual appeal while ensuring durability and safety.
Curing
Curing is essential for the concrete driveway installation to achieve its full strength and durability. The curing process involves maintaining adequate moisture levels in the concrete for at least seven days, allowing the chemical hydration process to continue. This prevents premature drying, which can lead to shrinkage cracks and surface weakness. There are several curing methods, including covering the concrete with wet burlap, plastic sheeting, or applying a curing compound to seal in moisture. In hot or windy conditions, additional precautions such as frequent water spraying may be necessary to prevent rapid evaporation. Proper curing ensures a stronger, more resilient driveway that will withstand daily use and environmental stresses over time.
By carefully executing these finishing and curing techniques, the concrete driveway installation will not only have an attractive, professional look but will also be more resistant to wear, weather, and potential structural issues in the long run.
Maintenance
A well maintained concrete driveway will last longer and continue to look great. Regular care ensures that your driveway remains functional, aesthetically pleasing, and protected from the elements. By taking proactive steps during and after concrete driveway installation, you can prevent damage, minimise wear and tear, and maintain the integrity of your driveway for years to come. Below are some key maintenance tips to help you keep your concrete driveway installation in excellent condition.
Sealing
Applying a high-quality sealant to your driveway every 2-3 years is one of the most effective ways to prolong its lifespan and maintain its appearance. Sealants act as a protective barrier against water penetration, oil and grease stains, and damage from harsh weather conditions. They also help to prevent cracks caused by repeated freezing and thawing cycles. Before applying a sealant, make sure the surface is clean and dry. Choose a sealant suitable for outdoor concrete and follow the manufacturer’s instructions for the best results. Regular sealing not only enhances durability but also keeps the concrete driveway installation looking fresh and well-maintained.
Cleaning
Dirt, leaves, and debris can accumulate on your driveway over time, leading to discolouration and staining. To keep it clean, use a pressure washer or a strong garden hose to remove built-up grime. A mild detergent or specialised concrete cleaner can be used to tackle stubborn stains, such as oil or tyre marks. Avoid using harsh chemicals that may damage the surface or degrade the sealant. Regular cleaning not only improves the appearance of your concrete driveway installation but also helps to prevent mould and mildew growth, which can make the surface slippery and unsafe.
Repairs
Cracks and chips in a concrete driveway installation should be repaired as soon as they are noticed to prevent further deterioration. Small cracks may seem minor at first, but they can quickly expand due to weather changes, vehicle traffic, and moisture penetration. Use a concrete patching compound or crack filler to seal any gaps and prevent water from seeping in. For larger cracks or areas of damage, professional repair may be required to ensure a long-lasting fix. Addressing issues early can save you from costly repairs in the future and help maintain the structural integrity of your concrete driveway installation.
By following these simple maintenance steps, you can ensure that your concrete driveway installation remains in great condition for years to come. Regular care not only enhances curb appeal but also protects your investment and reduces the need for extensive repairs down the track.
Why Choose Our Services
- Expertise: With years of experience, we guarantee high quality workmanship.
- Local Knowledge: We understand Townsville’s climate and soil conditions.
- Quality Materials: We use only the best concrete mixes and reinforcement materials.
- Custom Designs: Tailored solutions to match your home’s aesthetic.
- Customer Satisfaction: We prioritise your satisfaction with excellent service and results.
Contact Us
Ready to start your concrete driveway installation? Contact us today for more details or to request a free quote. Your perfect driveway is just a call away!
FAQs
The installation of a concrete driveway generally takes around 3 to 5 days, but this can vary depending on factors such as the size of the driveway, the complexity of the design, and weather conditions. The first step involves site preparation, which includes clearing and levelling the area. After that, the concrete is poured and carefully shaped. It’s important to allow sufficient time for the concrete to cure, which typically takes around 24 to 48 hours before it’s safe to drive on, but full strength is achieved after about 7 days. If you choose to include additional decorative elements like stamping or exposed aggregate, the process might take a bit longer.
The standard thickness for a concrete driveway is about 100mm (10cm), which provides a solid, durable foundation for regular car traffic. However, for areas that experience more significant load, such as heavy trucks or larger vehicles, it’s advisable to increase the thickness to 125mm or 150mm. This extra thickness helps distribute weight more evenly, reducing the chances of cracks and ensuring that your driveway lasts longer. It’s also a good idea to consider reinforcing the concrete with steel mesh or rebar to add further strength, especially if the driveway will be subjected to heavy traffic.
Sealing your concrete driveway every 2 to 3 years is ideal. Sealing helps protect the concrete from the harsh Australian weather, including sun, rain, and frost, all of which can cause deterioration over time. The sealer forms a protective barrier that prevents water penetration, reducing the risk of cracks, stains, and scaling. If your driveway is exposed to de-icing salts, chemicals, or heavy oil stains, you may need to reseal it more frequently. Regular sealing will also maintain the aesthetic appeal of your driveway, keeping it looking newer for longer.
Absolutely! Concrete driveways can be customised in many ways to suit your style and the look of your home. You can opt for decorative finishes like stamped concrete, which mimics the appearance of natural stone, brick, or even wood, giving your driveway a more elegant and distinctive look. Alternatively, you might choose coloured concrete for a vibrant touch or exposed aggregate concrete, which offers a textured finish and a mix of colourful stones. The options are endless, and a skilled contractor can help you choose a design that enhances the overall curb appeal of your property.
Maintaining your concrete driveway is relatively straightforward. Start by keeping it clean – sweep it regularly to remove dirt and debris, and wash it occasionally with a pressure washer or hose to prevent stains from forming. If you notice any cracks or chips, it’s important to address them promptly by filling them with a suitable filler or patching compound to prevent them from widening. Additionally, applying a sealer every 2 to 3 years will protect the surface from weathering and wear. If the driveway is subjected to heavy traffic or harsh chemicals, be sure to monitor its condition more closely and take appropriate action to prevent damage.
Cracking is a common issue with concrete driveways, and it can occur for several reasons. One of the most frequent causes is improper installation, such as insufficient reinforcement or inadequate curing time. If the underlying soil hasn’t been properly prepared or compacted, the driveway may settle unevenly, leading to cracks. Extreme weather conditions, particularly freeze-thaw cycles, can cause concrete to expand and contract, leading to cracking. Overloading the driveway with heavy vehicles or placing excessive weight in concentrated areas can also contribute to damage. Lastly, chemicals like de-icing salts can weaken the concrete over time, causing it to crack or deteriorate.
Choosing our company means you’re getting a team of professionals who are committed to delivering top-quality results. We specialise in concrete driveway installations that not only look great but are built to last. Our team takes the time to understand your specific needs and offers tailored solutions, whether you’re looking for a functional driveway or something more decorative. We provide detailed, transparent quotes with no hidden fees, ensuring you know exactly what to expect throughout the project. With our extensive experience, attention to detail, and customer-focused approach, we make sure every driveway we install meets the highest standards of durability and style.
