
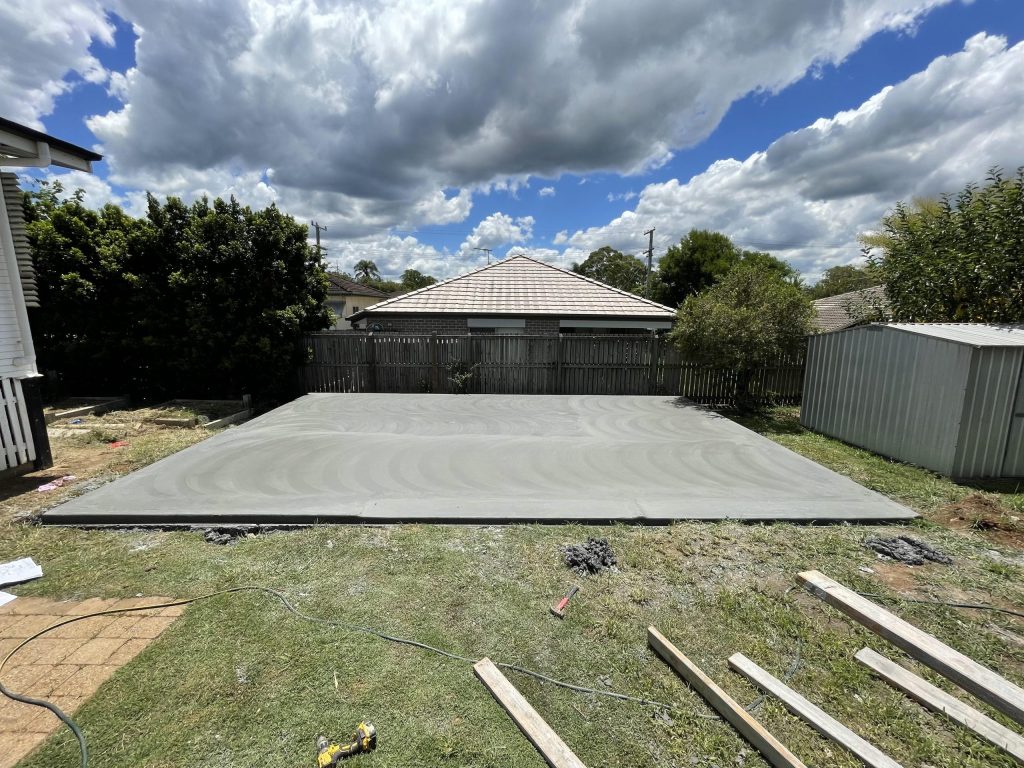
A concrete slab is the foundation of a solid shed. As an experienced concreter in Townsville, I understand the unique challenges and requirements of creating a reliable and long lasting concrete slab.
Here’s a comprehensive guide to help you lay a concrete slab that stands the test of time.
Table of Contents
- Finalising Your Shed Design
- Understanding Concrete Slab Dimensions
- Determining Slab Thickness
- Site and Soil Preparation
- Professional vs. DIY Slab Installation
- Detailed Construction Steps
- Legal and Contractual Considerations
- Preventing Cracks in Your Slab
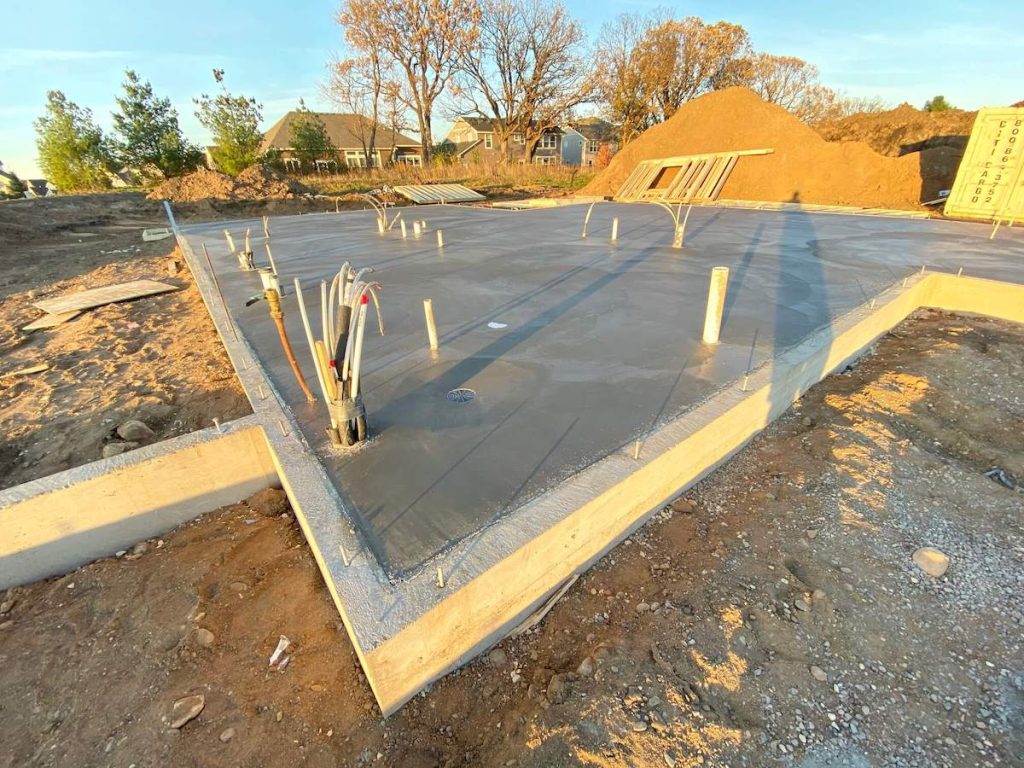
Laying a concrete slab requires careful planning and precise execution. This guide provides a step-by-step approach to ensure your shed’s foundation is robust and reliable.
1. Finalising Your Shed Design
Before pouring a Concrete Slab, it’s crucial to finalise your shed design to ensure the Concrete Slab aligns perfectly with the shed’s dimensions and load requirements. A well-thought-out design prevents costly mistakes and ensures the longevity of your structure. Here’s what to consider:
Accurate Dimensions
Example: If your shed is 6 metres by 9 metres, ensure the slab dimensions are slightly larger to allow for proper edge protection and drainage. For instance, adding an extra 100mm to each side can prevent water damage to the shed walls.
- Double check the shed’s specifications provided by the manufacturer or custom builder before committing to the slab size.
Load Bearing Requirements
Example: If the shed is intended to house heavy machinery, like a tractor or a caravan, design the slab with a thickness of at least 100mm to 150mm, depending on the expected load. For heavier loads, reinforced concrete with steel mesh is essential.
- For lightweight garden sheds, a thinner slab of around 75mm may suffice, provided the soil is adequately prepared.
Door and Entryway Placement
Example: Plan the location of roller doors or entry doors to ensure the slab accommodates thresholds, ramps, or drains. For sheds with wide roller doors, confirm that the slab extends smoothly to allow for easy vehicle access.
Utility Provisions
Example: If the shed will have plumbing, electrical wiring, or drainage systems, plan these beforehand. For instance, include conduit or drainage points in the slab design to avoid cutting into the concrete later.
Local Council and Building Regulations
Example: In many parts of Australia, building a shed requires council approval, particularly for larger structures. Confirm that your design complies with local regulations, including setbacks, height limits, and stormwater drainage requirements.
Climate and Environment Considerations
Example: In areas prone to heavy rainfall, slope the slab slightly away from the shed to prevent water pooling. For sheds in hotter climates, consider integrating insulation under the slab to manage temperature extremes.
By thoroughly finalising your concrete slab shed design before pouring the concrete slab, you save time and money, avoid unnecessary modifications, and create a solid foundation tailored to your needs.
2. Understanding Concrete Slab Dimensions
Accurate dimensions are crucial for ensuring the structural integrity and functionality of your shed’s Concrete Slab. Below is a detailed explanation of why these Concrete Slab dimensions matter and examples to guide your planning.
Why Accurate Dimensions Matter
Structural Stability:
A slab that is too small can lead to uneven load distribution, increasing the risk of cracks or shifts over time.Support for the Shed:
A properly sized slab provides a stable foundation for the walls and roof of the shed, ensuring longevity and safety.Room for Adjustments:
Slightly larger slabs accommodate minor alignment errors during construction and provide space for additional anchoring.
Recommended Slab Dimensions
The Concrete Slab should typically exceed the shed’s footprint by a small margin, such as 50mm to 100mm on each side. This overhang provides extra stability and prevents water ingress by directing rain away from the shed’s base. Below are examples for different shed sizes:
a. Small Shed (e.g., 3m x 3m):
- Recommended slab size: 3.1m x 3.1m
Explanation: The 50mm overhang on each side ensures the walls sit securely within the slab perimeter.
b. Medium Shed (e.g., 4m x 6m):
- Recommended slab size: 4.1m x 6.1m
Explanation: The slight increase in size allows for precise placement of the shed while accommodating minor construction errors.
c. Large Shed (e.g., 6m x 9m):
- Recommended slab size: 6.2m x 9.2m
Explanation: For larger structures, the added margin ensures a robust and well supported foundation.
Additional Considerations
- Thickness of the Slab:
For most sheds, a slab thickness of 100mm is sufficient. However, larger sheds or those housing heavy equipment may require thicker slabs. - Reinforcement:
Adding steel mesh or rebar to the slab increases its strength, particularly for larger sheds. - Slope and Drainage:
A slight slope (e.g., 1:100) can help direct water away from the shed’s base, reducing moisture related issues. Site Preparation:
Ensure the ground is level and compacted before pouring the concrete to avoid settling or unevenness.
By planning and implementing these dimensions correctly, you can ensure your shed has a solid and durable Concrete Slab foundation for years to come.
3. Determining Slab Thickness
Choosing the appropriate Concrete Slab thickness for a construction project is critical to ensuring structural integrity, durability, and functionality. The decision is influenced by factors such as the type of structure, load requirements, and soil conditions.
Standard Slab Thickness
a. General Guidelines:
Standard residential and light commercial slabs typically range from 85mm to 100mm in thickness.
Example: A concrete driveway or patio for a residential home is usually poured with a slab thickness of 100mm.
Thinner Slabs (75mm)
a. Lightweight Structures:
For lighter structures, such as small garden sheds or footpaths, a slab thickness of 75mm may suffice.
Example: A concrete slab for a backyard garden shed, which has minimal weight and limited usage, can be poured at 75mm.
Thicker Slabs (100mm+)
a. Heavier Loads:
In areas where heavier loads are anticipated, such as garages or industrial flooring, slabs of at least 100mm or more may be required. Additional reinforcement, such as steel mesh or rebar, might also be necessary.
Example: A slab designed to support heavy vehicles, like an industrial workshop or a loading dock, often requires a thickness exceeding 100mm.
Factors Influencing Slab Thickness
a. Load Requirements:
Heavier loads demand thicker slabs to prevent cracking and ensure longevity.
Example: A warehouse storing heavy machinery would require a thicker slab compared to a residential driveway.
b. Soil Conditions:
Weak or expansive soils may require thicker slabs or special foundation designs to mitigate movement and settling.
Example: In areas with clay soils, a slab might need additional thickness or a stabilised subbase to counteract soil shrinkage and swelling.
c. Climate Conditions:
Extreme weather conditions, such as freeze thaw cycles, can influence the required slab thickness to reduce cracking.
Example: In regions prone to frost, slabs may include thicker edges or insulation to protect against heaving.
Reinforcement and Alternatives
a. Steel Reinforcement:
Adding steel mesh or rebar increases the slab’s tensile strength, allowing it to support higher loads with less risk of cracking.
Example: A reinforced concrete slab for a multi car garage might feature 150mm thickness with steel rebar.
b. Fibre Reinforcement:
Fibre additives, such as polypropylene or steel fibres, can improve slab durability while maintaining standard thickness.
Example: A 100mm driveway slab with polypropylene fibres for increased resistance to cracking caused by shrinkage.
Practical Recommendations
Always consult with a structural engineer or a qualified contractor to determine the appropriate slab thickness for your specific project.
Consider local building codes and regulations, which may stipulate minimum thickness requirements for certain applications.
Example: Some Australian councils may mandate a minimum slab thickness for driveways connecting to public roads.
Conduct soil testing when building on uncertain terrain to avoid issues with foundation settling or movement.
4. Site and Soil Preparation
Proper site and soil preparation are critical steps in ensuring the success and longevity of your Concrete Slab project. Below is a detailed breakdown of the key actions to take during this stage, with practical examples and tips.
Conduct Soil Tests
a. Why: Understanding the soil’s composition, pH, and nutrient levels is crucial for selecting appropriate plants or ensuring structural integrity.
- For example, a sandy soil might require amendments to improve water retention, while clay heavy soil may need aeration for better drainage.
b. How:
- Collect soil samples from multiple locations on the site.
- Use a soil testing kit or send samples to a local laboratory for analysis.
- Identify deficiencies or imbalances and apply recommended amendments, such as lime for acidic soils or gypsum to improve clay.
Ensure the Site is Level
a. Why: A level surface prevents water pooling, ensures structural stability, and improves aesthetics.
- For instance, uneven ground could lead to waterlogging in some areas or instability in paving or construction.
b. How:
Use string lines or a laser level to measure and mark the desired grade.
Excavate high points and fill low areas with appropriate materials like topsoil or gravel.
Compact filled areas to prevent future settling.
Address Soil Compaction
a. Why: Compacted soil can inhibit root growth, water infiltration, and drainage, leading to long term issues.
- For example, if you’re planting a garden, compacted soil can stunt plant growth due to restricted root development.
b. How:
- Loosen compacted areas with a rotary hoe, aerator, or spading fork.
- Incorporate organic matter like compost to improve soil structure.
- Avoid heavy machinery on the site after preparation to minimise further compaction.
Additional Tips for Site Preparation
a. Drainage:
- Install proper drainage systems, such as French drains or surface grading, to direct water away from buildings or key areas.
b. Weed Removal:
- Remove all existing vegetation, especially invasive weeds, to prevent regrowth and competition with desired plants.
- Use herbicides or manual removal methods as appropriate.
c. Boundary Marking:
- Clearly mark the boundaries of the site to avoid encroachment and ensure accurate measurements.
- For example, use stakes and high visibility string to outline the area.
By following these steps and examples, you can create a solid concrete slab foundation for your project, whether it’s a garden, a building, or another outdoor endeavour. Taking the time to prepare the site and soil properly before pouring the concrete slab will save time and resources in the long run.

5. Professional vs. DIY Slab Installation
When it comes to concrete slab installation, the choice between hiring a professional concreter and undertaking a DIY approach can significantly impact the quality, longevity, and safety of your project. Below, we explore the key differences and considerations for both approaches in concrete slab work.
Benefits of Hiring a Professional Concreter
Hiring a professional concreter ensures that your concrete slab project is handled with expertise and precision. Professionals bring years of experience and specialised knowledge that can save time, money, and future headaches when working on a concrete slab. Here are some specific advantages:
Expertise in Soil Reactivity:
- Professionals are trained to assess the soil type and its reactivity to moisture changes.
- They can recommend appropriate slab designs, such as waffle pods for reactive soils or stiffened raft slabs for uniform load distribution.
Precision in Load Distribution:
- Concreters understand how to calculate and implement proper load distribution to prevent structural failures.
- They ensure reinforcement placement, slab thickness, and curing are executed correctly.
Access to Quality Materials and Equipment:
- Professionals often have access to higher grade concrete mixes and reinforcement materials.
- They use specialised tools like laser levels, concrete vibrators, and curing blankets to ensure a durable finish.
Compliance with Australian Standards:
- Licensed concreters are familiar with local building codes, such as AS 3600 for concrete structures.
- They ensure your slab meets regulatory requirements, avoiding potential legal and safety issues.
Challenges of DIY Slab Installation
While a DIY approach may seem cost effective, it comes with several challenges and risks that can compromise the outcome of your project. Consider these potential drawbacks:
Limited Knowledge of Soil Conditions:
- Without professional training, accurately assessing soil conditions and their impact on the slab can be difficult.
- Mistakes in this area can lead to cracking, shifting, or failure of the slab.
Inadequate Tools and Materials:
- DIYers often lack access to high quality materials and specialised equipment.
- Using inferior products or tools can result in uneven surfaces, poor finishes, and reduced durability.
Time and Labour Intensive:
- Slab installation involves physically demanding tasks like digging, levelling, mixing, and pouring concrete.
- Without a team of skilled workers, the process can be exhausting and time consuming.
Risk of Mistakes:
- Errors in measurements, reinforcement placement, or curing can compromise the slab’s integrity.
- Repairing these mistakes often costs more than hiring a professional from the outset.
When DIY Might Be Suitable
While professional installation is generally recommended, a DIY approach might work for smaller projects or non-structural slabs. Examples include:
a. Garden Pathways:
- Laying a concrete path in your garden is less complex and typically requires minimal load bearing considerations.
b. Small Sheds or Outdoor Features:
- For lightweight sheds, small patios, or decorative features, DIY can be a feasible option with proper preparation.
c. Pre-Mixed Concrete Options:
- Using pre mixed concrete bags simplifies the mixing process and is suitable for small scale jobs.
Key Takeaways
- Hiring a professional concreter ensures quality, compliance with Australian standards, and long term durability.
DIY may save initial costs but carries risks such as structural issues, higher repair costs, and time intensive labour.
For complex or structural projects, professional expertise is essential to avoid costly mistakes.
DIY can be considered for smaller, non-structural projects with careful planning and execution.
6. Detailed Construction Steps
The construction of a concrete slab requires careful planning and precise execution to ensure the concrete slab’s durability and strength. Below is a detailed breakdown of each step involved in the concrete slab construction, complete with examples to illustrate best practices.
1. Marking and Excavation
a. Outline the slab area:
Clearly mark the dimensions of the slab using stakes, string lines, or marking spray. Ensure the measurements are accurate to meet design specifications.
Example: For a driveway, use a laser level to check the slope for proper drainage.
b. Excavate to the required depth:
Dig down to the specified depth, which includes space for the slab and any base layers (e.g., compacted gravel or sand).
Example: For a standard residential slab, excavation depth may include 100mm for the concrete and 50mm for a compacted base layer.
2. Formwork Setup
a. Install formwork:
Set up wooden or metal boards around the perimeter to define the shape and boundaries of the slab.
Example: Use treated timber planks for small garden slabs or prefabricated steel forms for large commercial slabs.
b. Ensure level and secure formwork:
Check the formwork for levelness using a spirit level and reinforce with stakes to prevent movement during pouring.
Example: Use additional bracing for formwork when constructing on a sloped surface to avoid collapse.
3. Reinforcement Placement
a. Add steel reinforcement:
Lay a steel mesh or rebar grid inside the formwork to provide additional tensile strength to the slab.
Example: For a footpath, use a standard 100mm x 100mm steel mesh, while for industrial floors, consider using double layered reinforcement.
b. Elevate the reinforcement:
Use plastic or metal bar chairs to lift the steel mesh off the ground so it sits in the middle of the concrete slab.
Example: Space bar chairs evenly every 1 metre to ensure uniform placement of the mesh.
4. Pouring Concrete
a. Prepare the concrete:
Use a concrete mix that meets the structural and environmental requirements, such as 25 MPa strength for driveways.
Example: For DIY projects, use pre-mixed concrete; for larger jobs, order ready mix concrete from a supplier.
b. Pour the concrete evenly:
Begin pouring from one corner and work methodically to fill the area, avoiding gaps and air pockets.
Example: Use a concrete vibrator to eliminate air pockets in foundations or thick slabs.
5. Levelling and Smoothing
a. Level the surface:
Use a screed board to remove excess concrete and create an even surface.
Example: For a patio, use a straight timber or aluminium screed to pull across the top of the formwork.
b. Smooth the surface:
Use a bull float or trowel to create a smooth finish, depending on the desired texture.
Example: For a garage floor, finish with a steel trowel to achieve a polished surface suitable for vehicles.
6. Curing
a. Allow proper curing:
Concrete requires time to gain strength, typically at least seven days, but 28 days for full curing.
Example: Keep the slab moist during curing by covering it with damp hessian cloth or plastic sheeting.
b. Protect the slab:
Avoid placing heavy loads or working on the slab during the curing period to prevent cracks or damage.
Example: In hot climates, water the slab multiple times a day to prevent premature drying and cracking.
By following these detailed steps, you can ensure the construction of a durable, long lasting concrete slab, making it suitable for your specific project needs.

7. Legal and Contractual Considerations
When engaging a contractor for concrete slab work, adhering to proper legal and contractual processes is essential to protect your interests and ensure quality outcomes. Below are detailed considerations and examples:
Importance of a Written Contract
A written contract provides clarity and legal protection for both parties. It sets out expectations, deliverables, and responsibilities, minimising misunderstandings.
a. Clearly Define Scope of Work:
Specify the exact requirements, such as slab size, thickness, reinforcement, and concrete mix.
Example: “The slab must be 100mm thick with reinforced steel mesh (SL72) and a concrete strength of 25 MPa.”
b. Timeline and Deadlines:
Include a start and completion date to ensure the project stays on schedule.
Example: “The project will commence on 1 March 2025 and be completed by 15 March 2025.”
c. Payment Terms:
Outline the payment structure, including deposits, progress payments, and final payment conditions.
Example: “10% deposit, 40% at the halfway point, and 50% upon final inspection and approval.”
Withholding Final Payment
Withholding the final payment until all specifications are met ensures the contractor completes the work to the agreed standards.
a. Quality Assurance Clause:
State that the final payment is contingent upon meeting specific criteria.
Example: “Final payment will only be released after the slab meets thickness, strength, and finish requirements as outlined in the contract.”
b. Independent Inspection:
Engage a third party inspector to verify that all specifications have been met before releasing payment.
Example: “An independent engineer will assess the slab for compliance with Australian Standards AS 3600 (Concrete Structures).”
Legal Compliance
Ensure that your contractor adheres to local laws and building regulations.
a. Licensing:
Verify that the contractor holds the necessary licences to perform concrete work in your state or territory.
Example: “The contractor must hold a valid QBCC (Queensland Building and Construction Commission) licence.”
b. Permits:
Confirm that all required permits have been obtained before work begins.
Example: “The contractor is responsible for securing council approval for the slab installation.”
c. Insurance:
Ensure the contractor has adequate insurance to cover potential damages or injuries.
Example: “The contractor must provide proof of public liability insurance with a minimum coverage of $5 million.”
Dispute Resolution
Include a dispute resolution clause to handle conflicts professionally and legally.
a. Mediation:
Specify mediation as the first step for resolving disputes.
Example: “Any disputes arising will first be referred to a mediator agreed upon by both parties.”
b. Arbitration or Litigation:
Outline further steps if mediation fails.
Example: “If mediation does not resolve the issue, the dispute will be resolved through arbitration in accordance with the Australian Arbitration Act.”
Record Keeping
Maintain comprehensive records throughout the project for future reference and legal purposes.
a. Documentation:
Keep copies of all contracts, permits, and correspondence.
Example: “Store email communication and meeting minutes in a dedicated project folder.”
b. Photographic Evidence:
Take photos of the slab at various stages to document progress and quality.
Example: “Capture images of reinforcement placement and finished concrete for quality assurance.”
By addressing these legal and contractual considerations, you can safeguard your interests, ensure accountability, and achieve a high-quality outcome for your concrete slab project.
8. Preventing Cracks in Your Slab
Cracks in concrete slabs can occur due to various factors, such as changes in temperature, shrinkage during curing, or ground movement in the concrete slab. By implementing proper techniques during construction and planning of the concrete slab, you can significantly reduce the likelihood of cracks forming. Below are key measures to prevent cracks in concrete slabs, along with examples of how to apply these techniques effectively.
1. Incorporate Saw Cuts
Saw cuts, also known as control joints, are deliberate grooves made in the slab to control where the concrete will crack. These joints create weakened planes, directing cracks to occur along pre determined lines instead of randomly across the surface.
Timing is critical:
Make the saw cuts within 4 to 12 hours after the concrete has been poured, depending on the weather and curing conditions. For example, in warm weather, cuts should be made earlier to prevent premature cracking.Proper spacing:
Space saw cuts appropriately based on the thickness of the slab. For instance, a 100mm thick slab should have joints spaced no more than 3 metres apart.Depth of cuts:
Ensure the depth of the saw cut is at least one quarter of the slab’s thickness. For example, for a 120mm-thick slab, the saw cuts should be at least 30mm deep.
2. Use Doweled Joints
Doweled joints involve the use of steel bars to connect two sections of concrete. These bars transfer loads across the joint and prevent differential movement, which can lead to cracking.
Align the dowels correctly:
Place dowels perpendicular to the joint to ensure effective load transfer. For example, for a driveway, dowels should be placed at the centre of the slab and spaced approximately 300mm apart.Use appropriate dowel sizes:
Select dowel diameters that suit the slab thickness and load requirements. For example, a 12mm diameter dowel may suffice for light loads, while a 25mm dowel is ideal for heavy traffic areas.Protect against corrosion:
Use epoxy coated dowels in areas exposed to moisture to prevent rusting and eventual failure of the joint.
3. Ensure Proper Curing
Proper curing is essential to prevent rapid moisture loss, which can cause shrinkage and cracking.
Apply curing compounds:
Spray curing compounds immediately after finishing the surface. For example, a water based curing compound can be used to retain moisture.Cover the slab:
Use plastic sheeting or wet hessian to maintain moisture levels. For instance, in hot climates, covering the slab can prevent excessive evaporation.Control temperature variations:
Avoid pouring concrete during extreme temperature fluctuations. For example, schedule the pour during the cooler parts of the day to minimise thermal stress.
4. Prepare a Stable Subgrade
The ground beneath the slab must be properly prepared to prevent uneven settling and subsequent cracking.
Compact the subgrade:
Use a mechanical compactor to ensure a firm base. For example, sandy soils may require additional compaction compared to clay soils.Add a sub base layer:
Place a layer of crushed rock or gravel beneath the slab for improved stability. For instance, a 100mm-thick layer of gravel can help distribute loads evenly.Ensure proper drainage:
Design the subgrade to prevent water accumulation. For example, install drainage pipes or slope the ground to direct water away from the slab.
5. Reinforce the Slab
Reinforcement strengthens the concrete and helps distribute stresses evenly, reducing the likelihood of cracking.
Use steel reinforcement:
Incorporate steel mesh or rebar within the slab. For example, a 150mm-thick slab might require N12 bars spaced at 200mm intervals.Position reinforcement correctly:
Ensure reinforcement is placed at the correct height within the slab. For instance, use chairs to elevate the steel mesh to the middle of the slab’s thickness.Consider fibre reinforcement:
Add synthetic or steel fibres to the concrete mix for additional crack resistance. For example, synthetic fibres can reduce plastic shrinkage cracks in large slabs.
By following these practices, you can ensure a durable and long lasting concrete slab, reducing the risk of cracks and associated maintenance costs.
Why Choose Our Services
- Expertise: With years of experience, we understand the nuances of concreting in Townsville’s climate.
- Quality Materials: We use only the highest quality concrete and reinforcement.
- Professional Team: Our team is skilled, reliable, and dedicated to excellence.
- Customer Satisfaction: We prioritise your satisfaction, ensuring every project meets your expectations.
- Free Quotes: Contact us for a free, no obligation quote.
For more details or to request a free quote, contact us today.
FAQs
The ideal thickness for a concrete slab for a shed typically falls between 85mm and 100mm. This range provides a sturdy and durable base that can handle most standard shed loads, including equipment and tools. However, the exact thickness you need depends on the specific load requirements of your shed and the soil conditions of your site. If your shed will house heavy machinery or vehicles, you might need to opt for the thicker end of the range or even consult a professional for advice. A well prepared base and the right thickness ensure your shed will be stable and long lasting.
Preparing the site for a concrete slab is an essential step to ensure a solid and durable foundation. Start by clearing the area of any vegetation, debris, or rocks, and then level the ground to create a flat surface. Depending on the soil type, you may need to compact the ground and add a layer of crushed rock or gravel for stability and drainage. It’s also important to install formwork around the perimeter to hold the concrete in place and ensure the slab has clean edges. Taking the time to properly prepare the site will help prevent issues like cracking or uneven settling down the track, giving you a reliable base for your project.
Yes, you can pour a concrete slab yourself, but it requires careful planning, the right tools, and some hard work. Start by preparing the site thoroughly, ensuring it’s level and properly compacted. You’ll need to build sturdy formwork, calculate the right concrete mix, and have a plan to pour and finish the slab efficiently, as concrete sets quickly. For smaller slabs, it’s a manageable DIY project, but for larger or more complex jobs, you might want to consider getting help or consulting a professional. With attention to detail and a bit of patience, pouring a concrete slab yourself can be a rewarding and cost effective way to tackle your project.
A concrete slab typically takes about 28 days to fully cure, but it will reach most of its strength within the first 7 days. During this time, it’s important to keep the surface moist to prevent it from drying out too quickly, as this can lead to cracking. You can walk on the slab after 24-48 hours, but avoid placing heavy loads on it for at least a week to give it time to gain strength. The curing process is crucial for the slab’s durability and long term performance, so it’s worth being patient and giving it the time it needs. Proper curing ensures your slab will stand the test of time and handle whatever load you’ve planned for it.
Reinforcement in a concrete slab is crucial for adding strength, durability, and resistance to cracking. Concrete is strong under compression but weaker under tension, so reinforcement like steel mesh or rebar helps it handle the stresses caused by weight, temperature changes, and ground movement. It also ensures the slab maintains its integrity over time, even under heavy loads or challenging conditions. Properly installed reinforcement can significantly extend the lifespan of your slab, making it a worthwhile investment. Whether you’re building a shed, driveway, or patio, reinforcement gives you peace of mind that your concrete will stay strong and stable for years to come.
When drawing up a contract with a concreter, it’s essential to include clear and detailed terms to protect both parties. Start with a description of the work to be done, including the size, thickness, and finish of the slab. Include the total cost, payment schedule, and any deposit required, ensuring all amounts are agreed upon upfront. Specify timelines for starting and completing the job, as well as any warranties or guarantees offered. It’s also wise to outline responsibilities, such as who will prepare the site, supply materials, and handle clean up. A well prepared contract sets clear expectations, reduces misunderstandings, and ensures a smooth and professional process.
Preventing cracks in a concrete slab starts with proper preparation and attention to detail during installation. Begin by ensuring the ground is well compacted and stable, as uneven or shifting soil can lead to cracking over time. Adding reinforcement, such as steel mesh or rebar, strengthens the slab and helps it withstand tension and heavy loads. Using control joints strategically placed in the slab allows for controlled cracking, ensuring any stress is directed along these lines instead of random spots. Finally, curing the concrete properly by keeping it moist for the first few days prevents it from drying out too quickly, reducing the risk of shrinkage cracks. With these steps, you can enjoy a durable and long lasting slab.
